

The predecessor to the dip switch was the bridge wire, this process included cutting or breaking a wire on the circuit board to “OPEN’ the contact. To program your old motor that uses the bridge wires you’ll want to first locate them. Most commonly you’ll find these on the back of your motor.

Once located you’ll want to inspect closely to determine which wires are cut or broken.
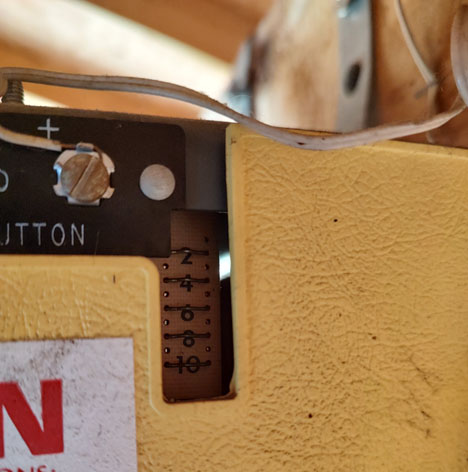
In the image above the #2 is broken or cut, so you will need to follow the following steps to program your new dip switch remote.
1. Put all switches on the NEW TRANSMITTER in the OPEN position
2. Old Transmitter wires are equivalent to the following switch positions:
Position #2 = Wire #1
Position #4 = Wire #2
Position #6 = Wire #3
Position #8 = Wire #4
Position #10 = Wire #5
3. On wires that are NOT cut move corresponding switch into opposite position.
EXAMPLE: Wire 2 is cut. Put all rockers in OPEN position and then put #4, #6, #8, and #10 in the DOWN position.
4. If the doesn’t work – Reverse all switches (open ones to close and closed one to open).
5. If you have a NINE switch remote the number 10 switch on the new remote needs to be in the OPEN position